⛔
You cannot edit an Ongoing sale event. Only Queued sale event is editable.
Steps:

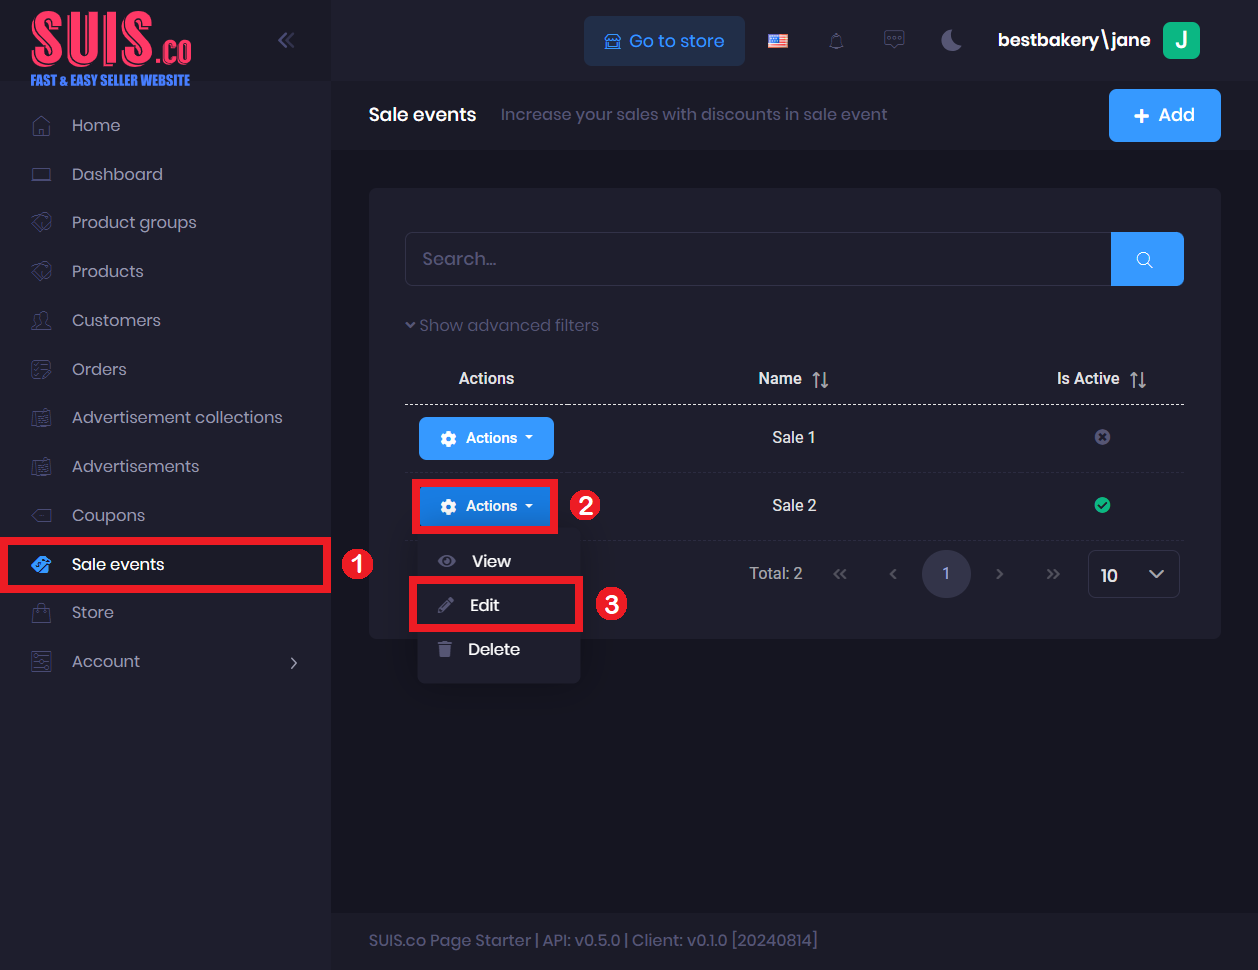
- Click Sale events.
- Click Action.
- Click Edit.

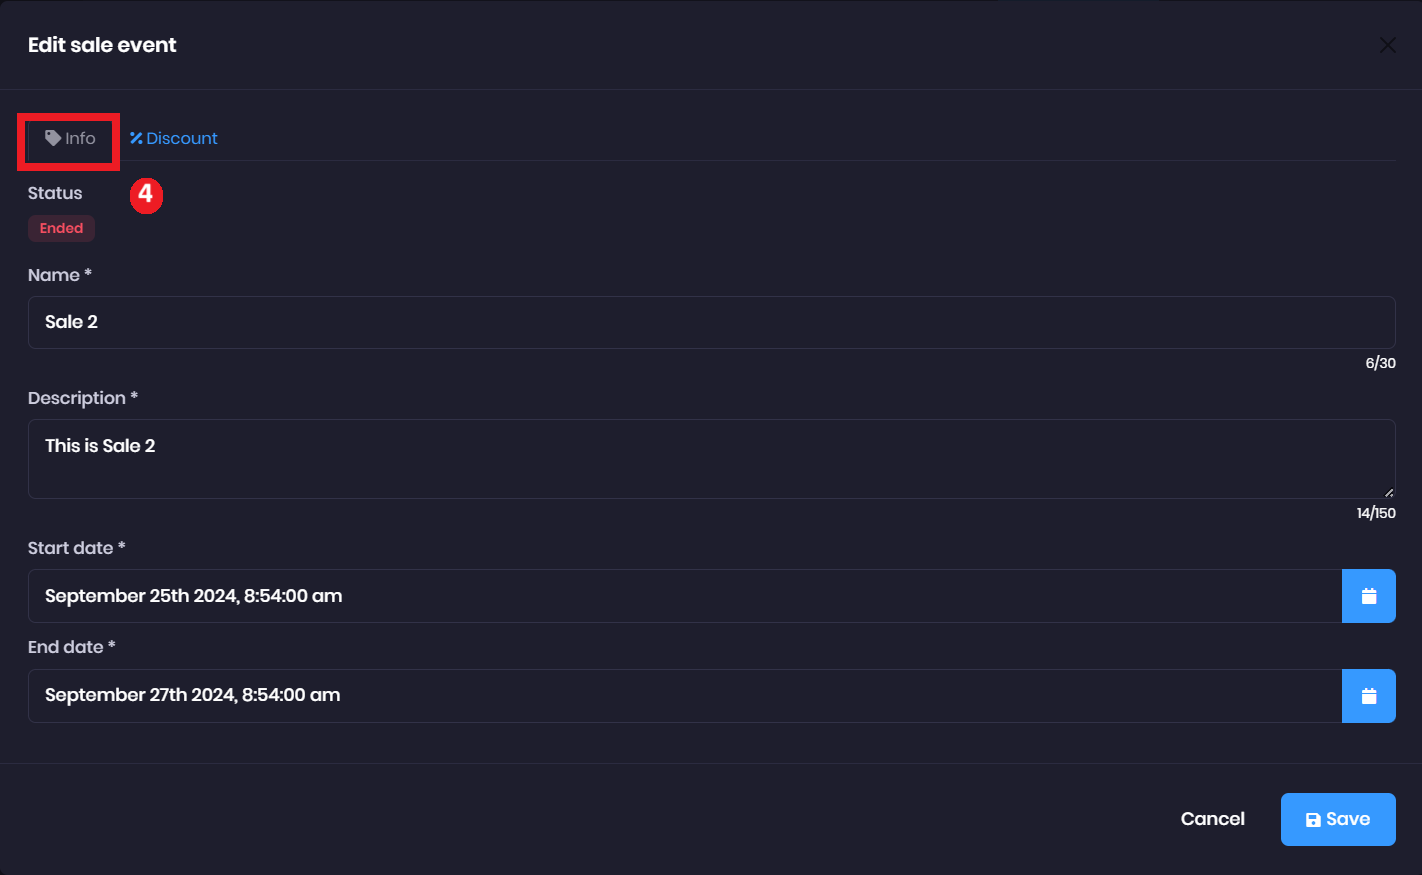
- It will popup Edit sale event, click Info tab
- Name (*) - Enter your sale event name. (Example: New Year Sale)
- Description (*) - Enter your sale event description. (Example: Get all products at 10% discount)
- Start date (*) - Select your sale event start date and time. (Example: June 1st 2024, 1:00:00 pm)
- End date (*) - Select your sale event end date and time. (Example: June 2nd 2024, 1:00:00 pm)
📝
Notes:
1. The End date has to be at least 1 day more than the Start date
2. Fields marked with (*) is required
1. The End date has to be at least 1 day more than the Start date
2. Fields marked with (*) is required

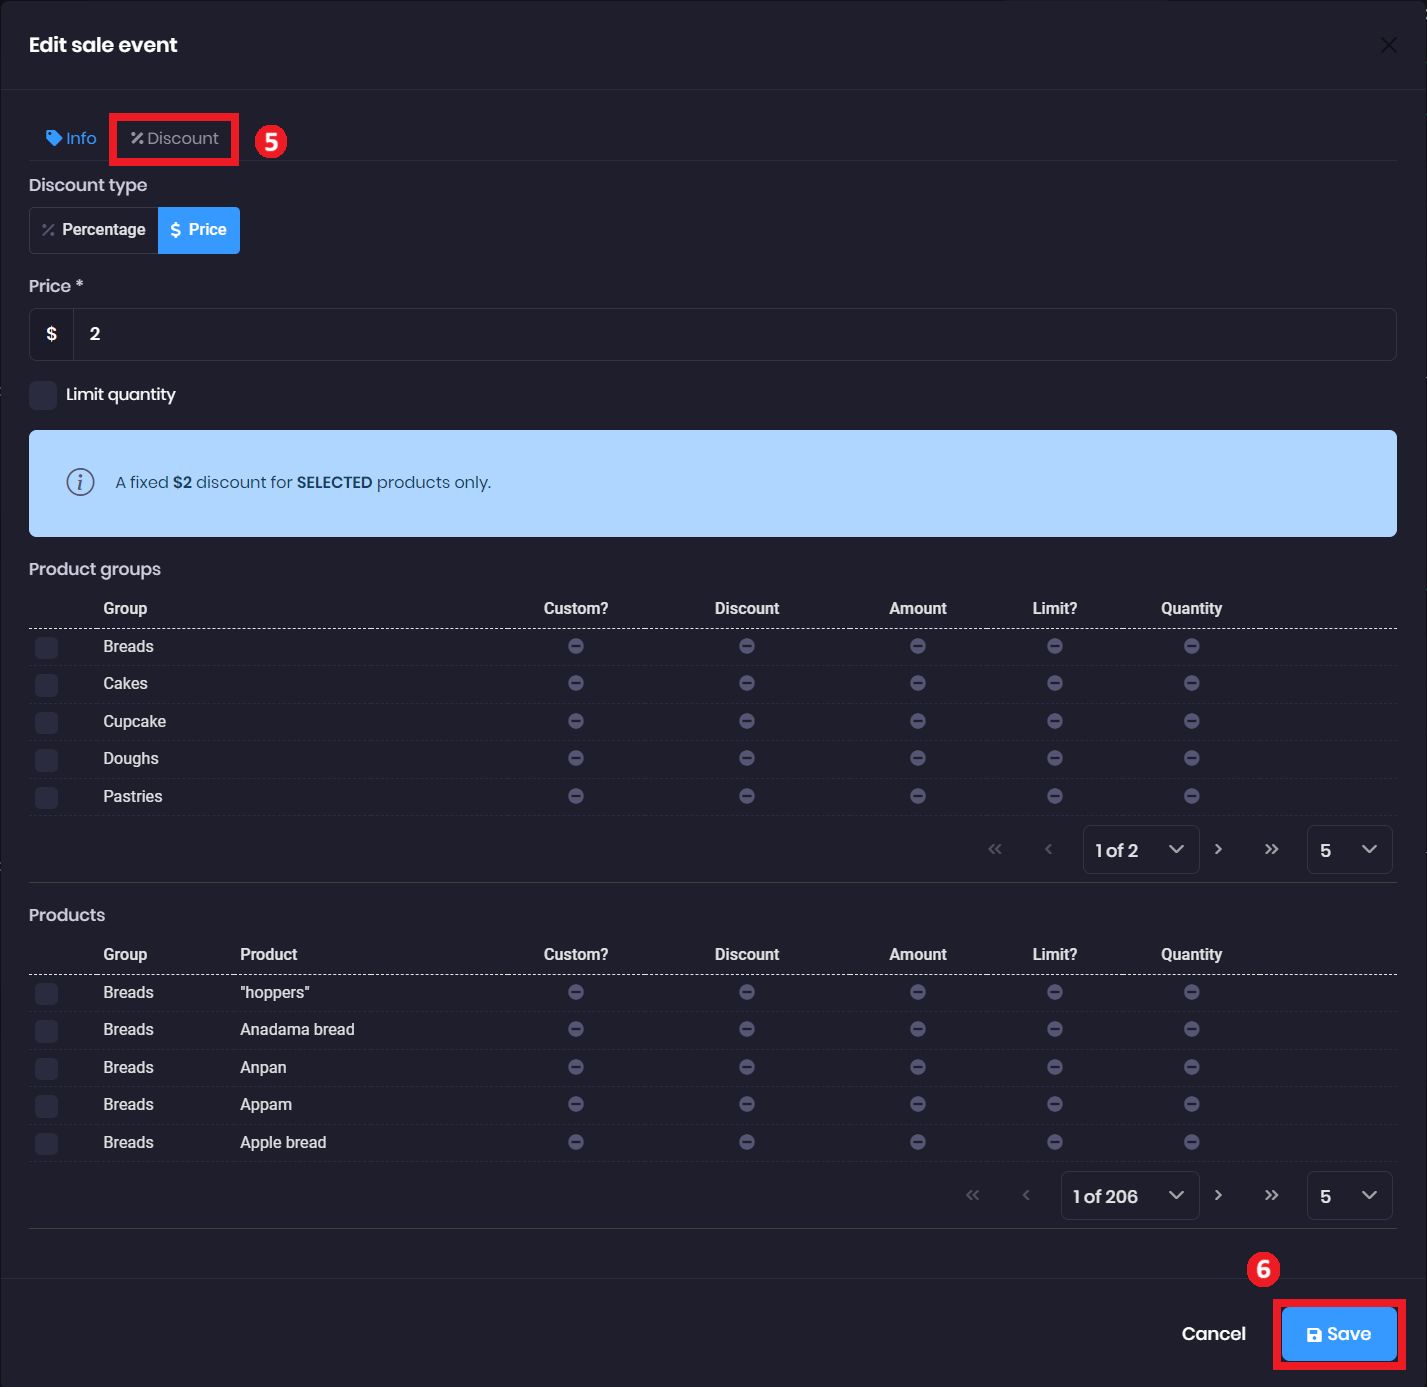
5 . Click Discount tab
- Discount type - Select a discount type for your sale event.
- Percentage - Enter the percentage to discount off from a product price.
- Price - Enter the amount to discount off from a product price.
- Limit quantity - Enter the number of products to which the discount can be applied. (For example: the limit quantity is set to 4, and the user adds 5 t-shirts to the cart; only the first 4 t-shirts are discounted)
- Product groups - Select the participating product groups in your sale event.
- Products - Select the participating products in your sale event.
📝
Notes:
You can control which Product or Product group participate in your sale event by:
1. ✔️ single click on the checkbox to include, or
2. ❌ double click on the checkbox to exclude.
You can enable options to set Discount type and Limit quantity to individual Products or Product groups by:
1. ✔️ single click on the checkbox of the Product or Product group.
2. ✏️ click on the edit icon.
3. ✔️ click on the custom checkbox to enable the options and set.
💡
Tips:
You can quickly exclude all Products belonging to a Product group from your sale event by:
1. ❌ double click on the checkbox of the Product group.
You can quickly exclude all Products belonging to a Product group from your sale event by:
1. ❌ double click on the checkbox of the Product group.
- Click Save to save your edits.

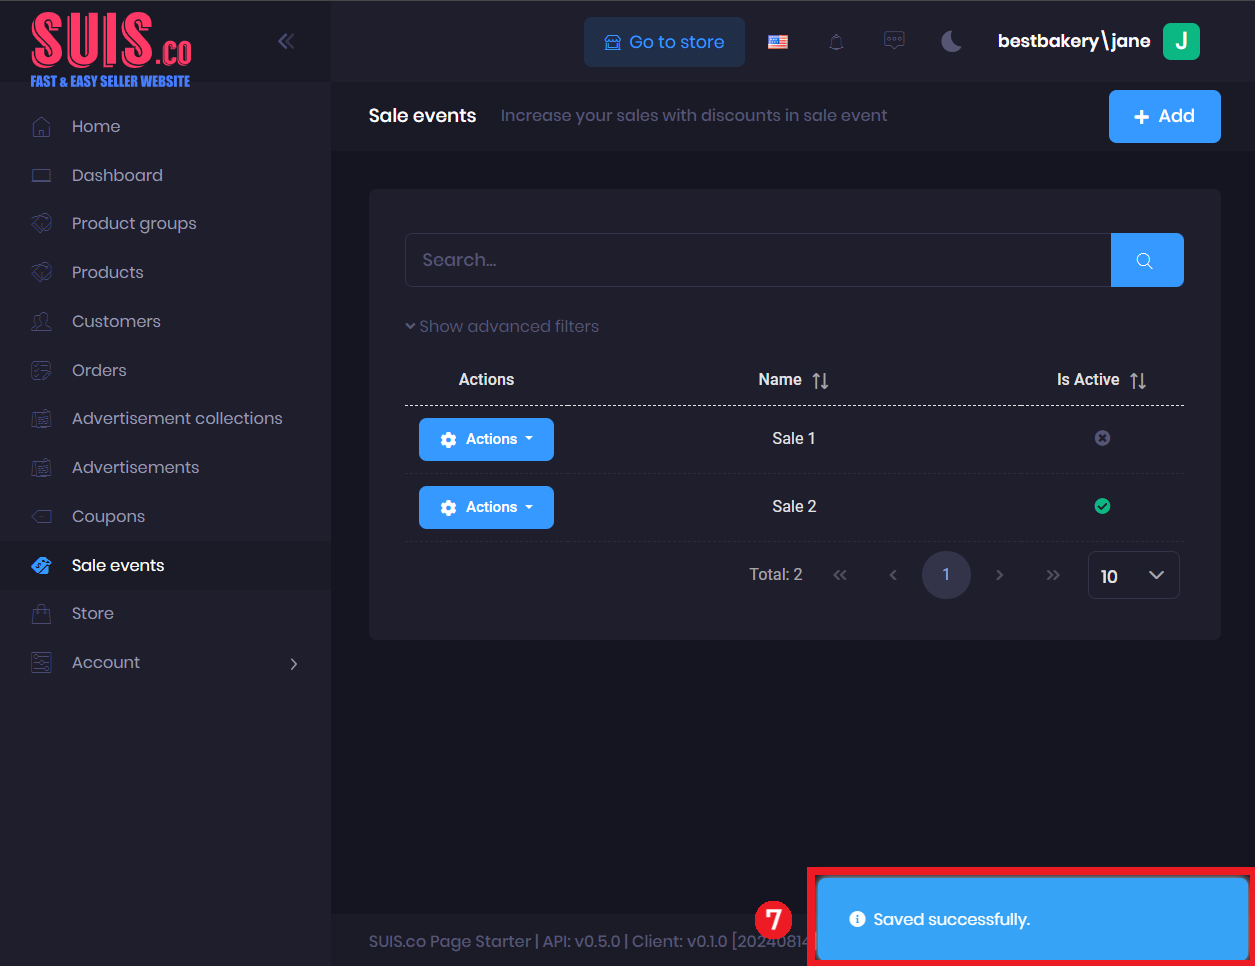
- Confirm your edits are saved with the notification.